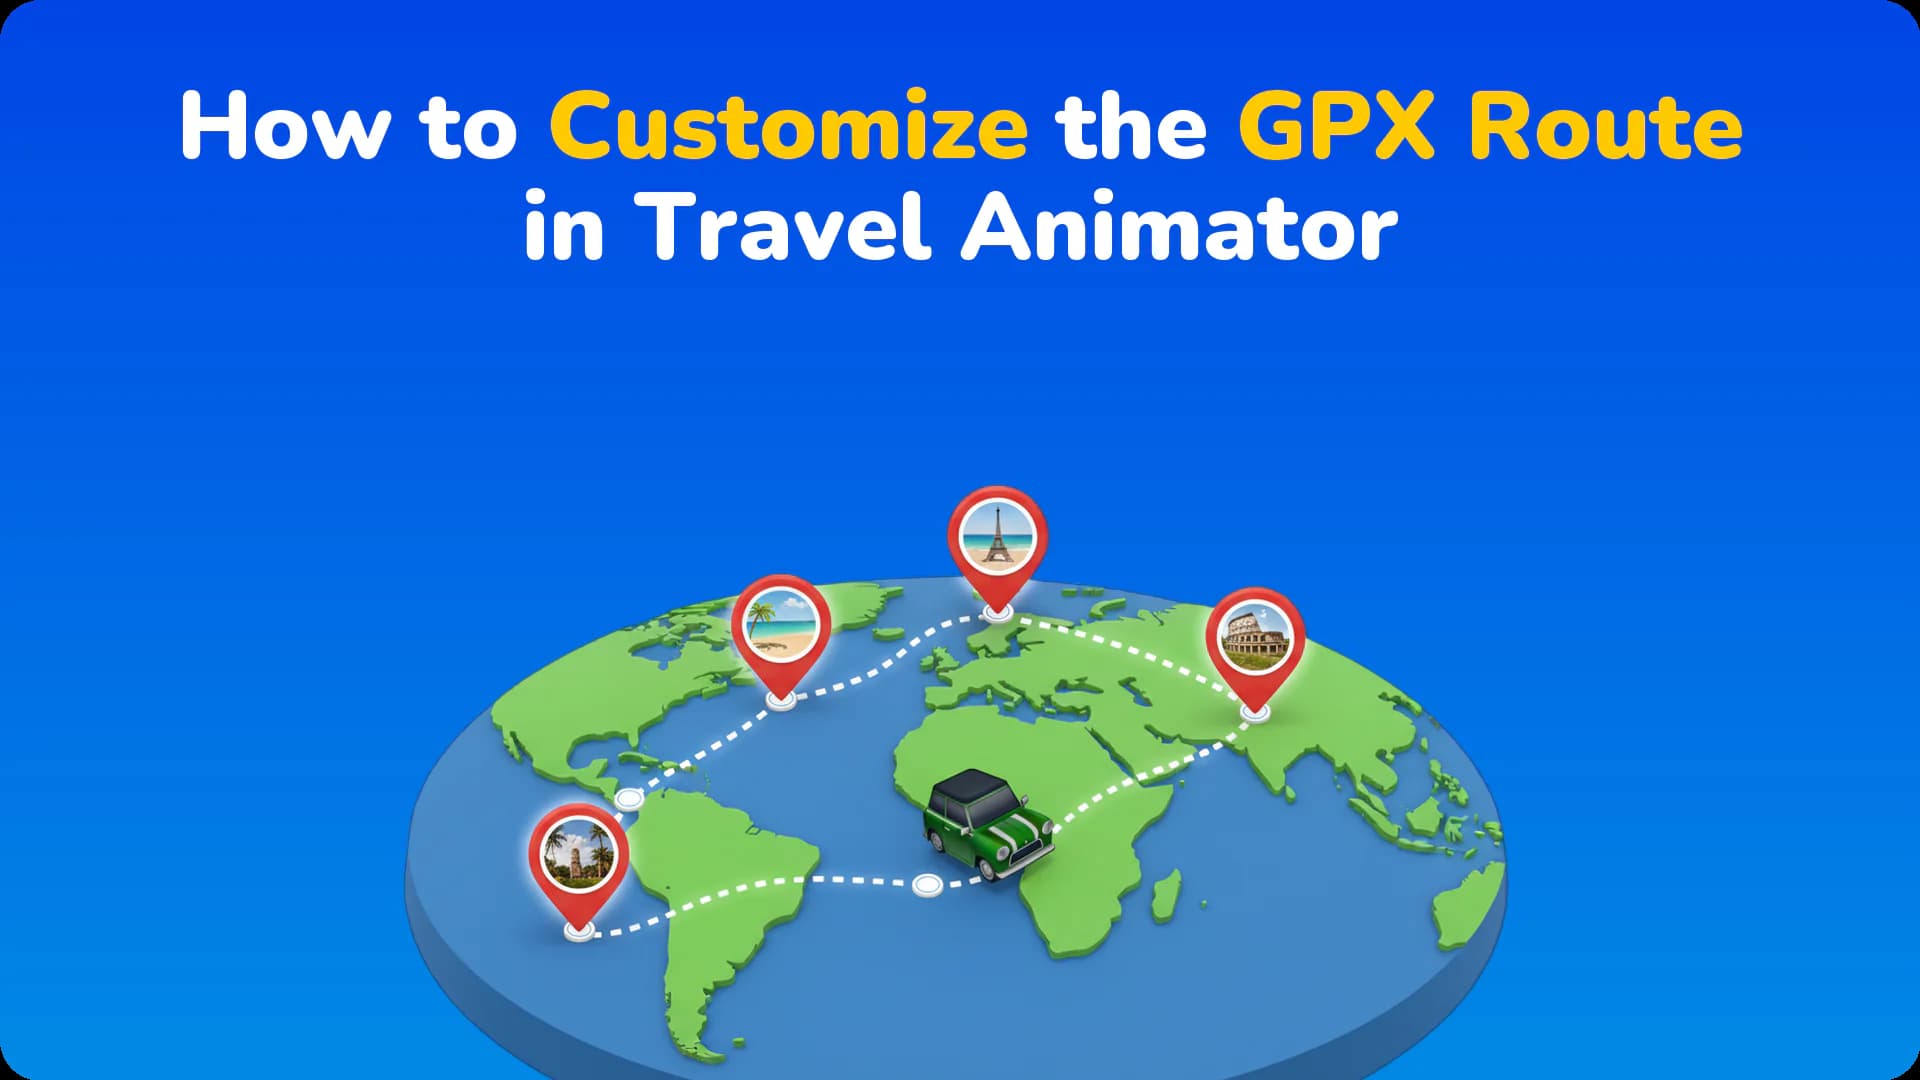

How to Change Travel Models in Travel Animator
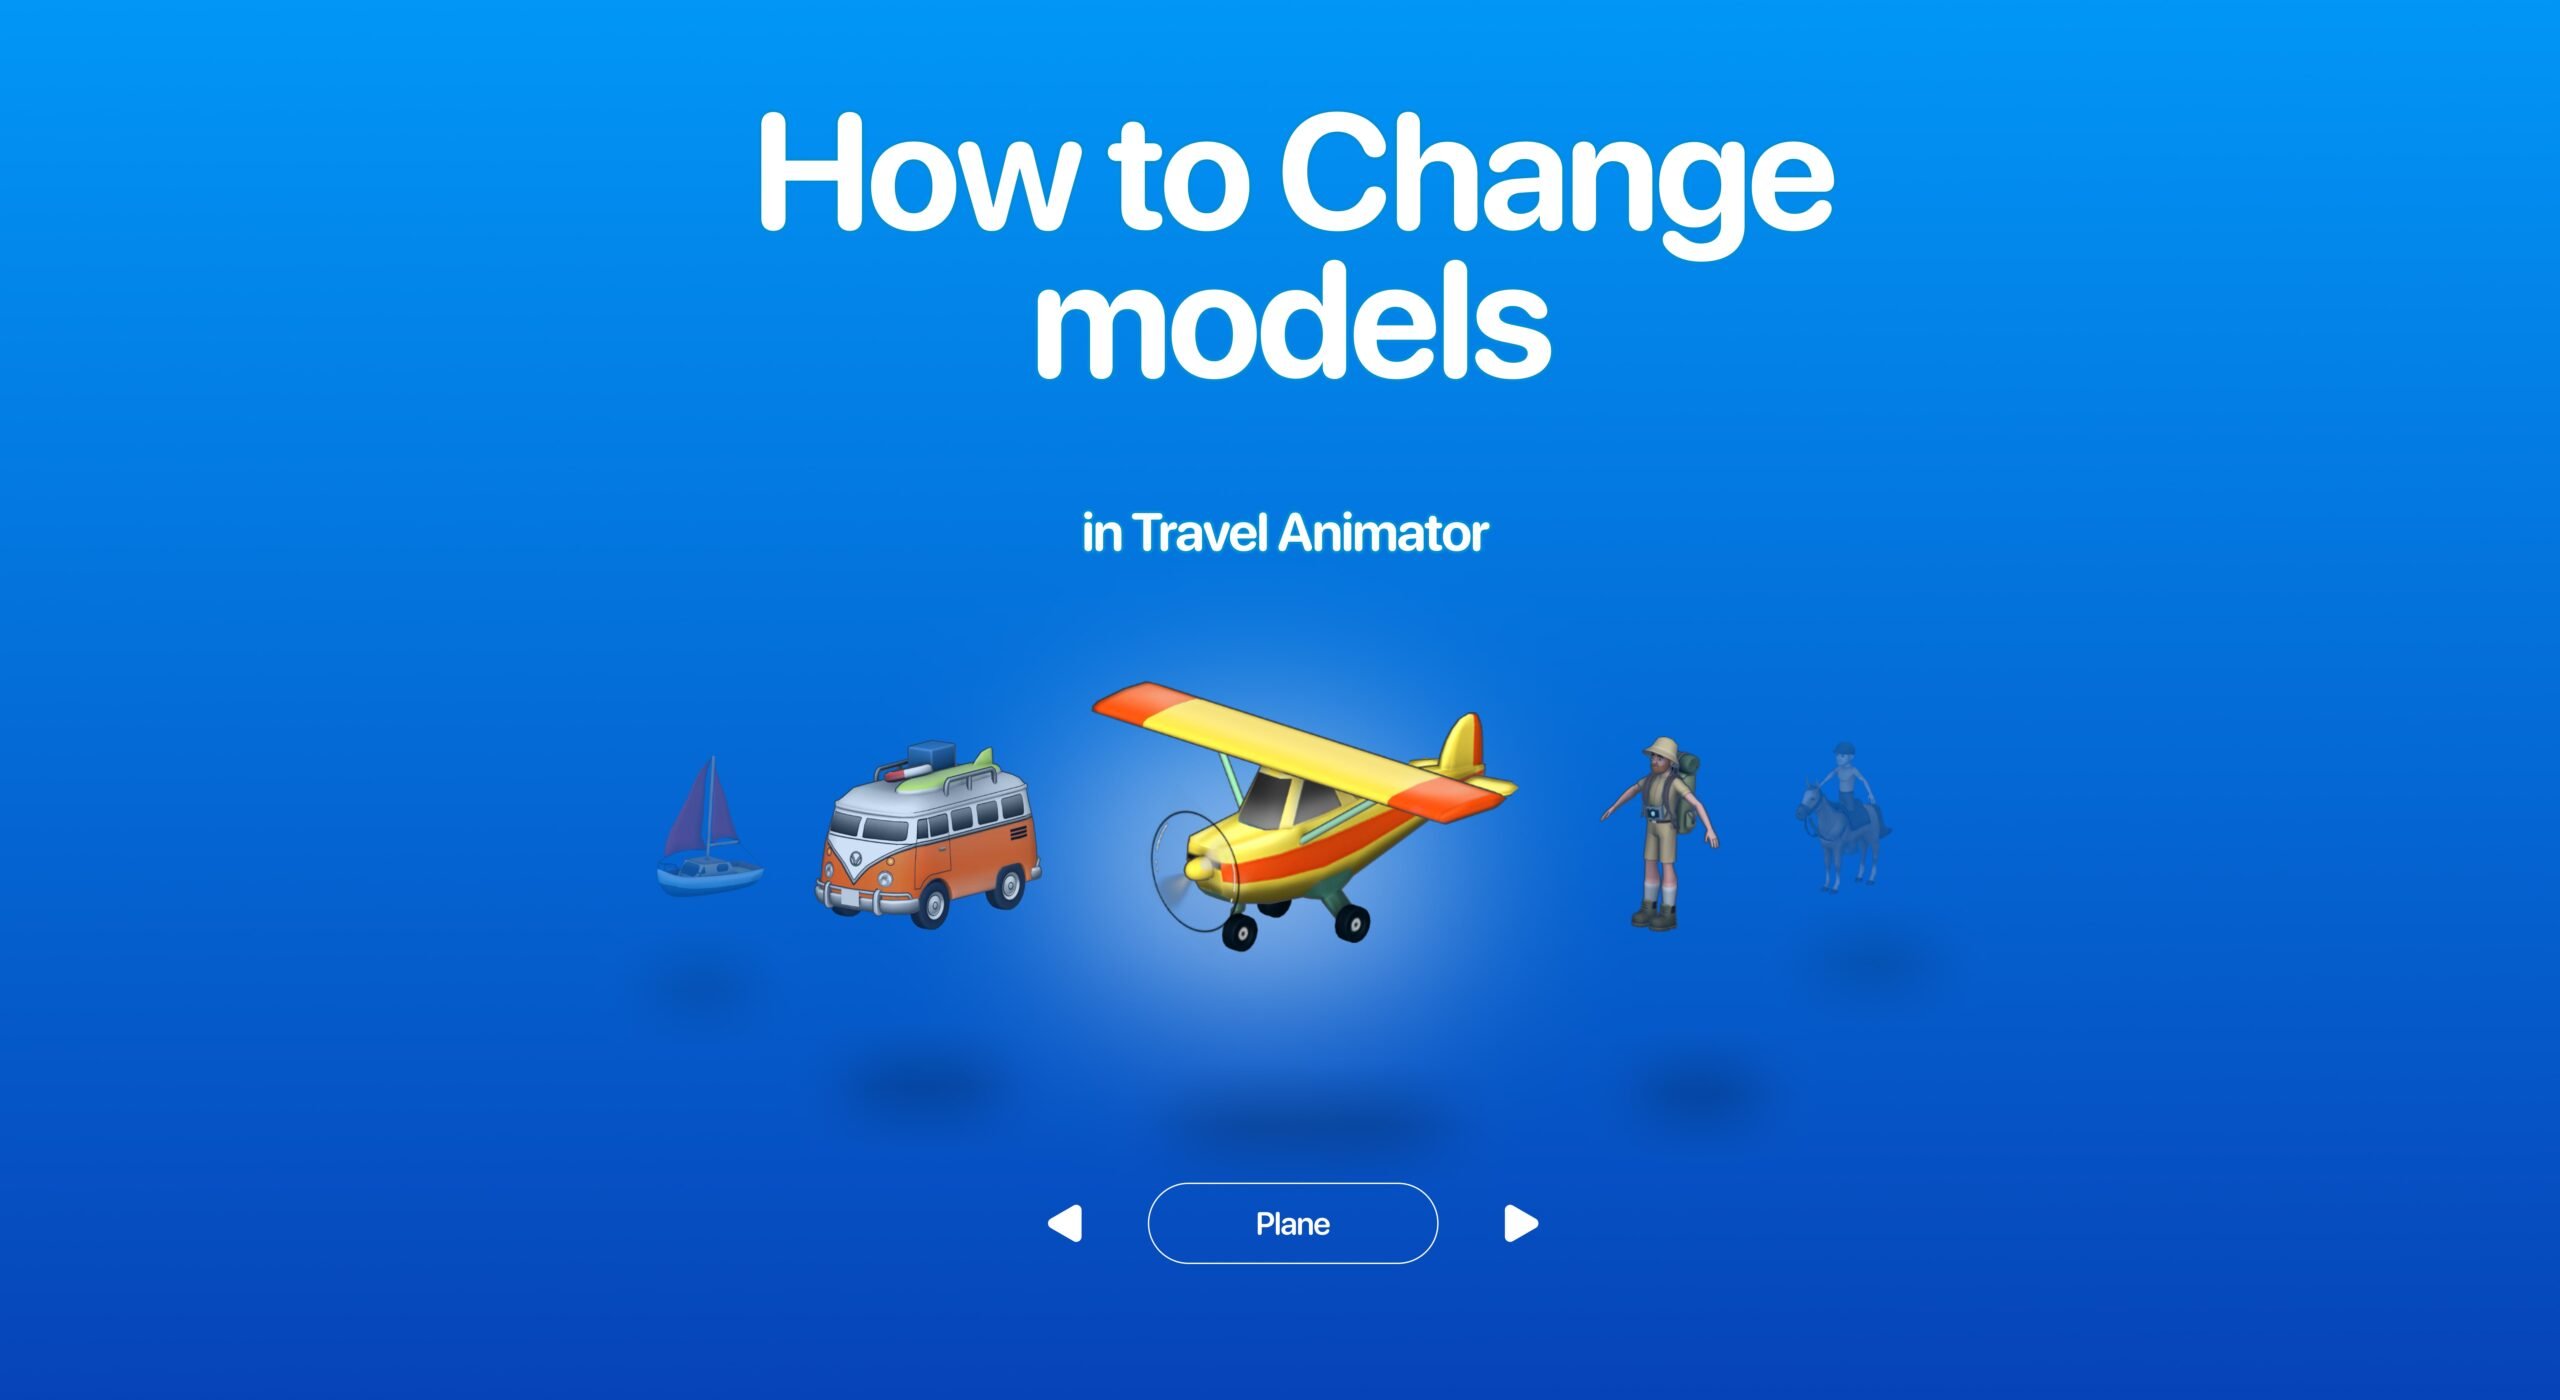
Travel Animator lets you replace models in travel animation videos, so you can choose the best models for your journey and vibe.
Imagine you are traveling from your home to Dubai. You start with a road trip to the airport in your car, and later your journey continues with an international flight. Instead of sticking to one model, Travel Animator lets you switch between a car and a plane to make your journey more realistic and engaging.
This guide walks you through how you can change models without further complications, with the latest UI updates and an expanded model library. Changing models is now faster, smarter, and more intuitive than ever, from basic steps to pro-level storytelling tips.
What Are Travel Models in Travel Animator?
Travel models are the animated vehicles or transport modes used in your animation video, such as cars, planes, trains, or boats.
They help to visually represent your journey, add realism to your route, and enhance storytelling and viewer engagement. Instead of a static path, models make your animation feel like a real trip unfolding.
What’s New in Model Switching (2026 Update)
The latest updates to the Travel Animator app have significantly improved how users interact with models.
Now TravelAnimator Expanded Model Library with 300+ vehicles, including real models, premium, and region-specific options.
These upgrades reduce friction and help you create professional-quality animations faster.
Step-by-Step: How to Change Models in Travel Animator
1.Open the Travel Animator app and start a new project or open an existing animation.
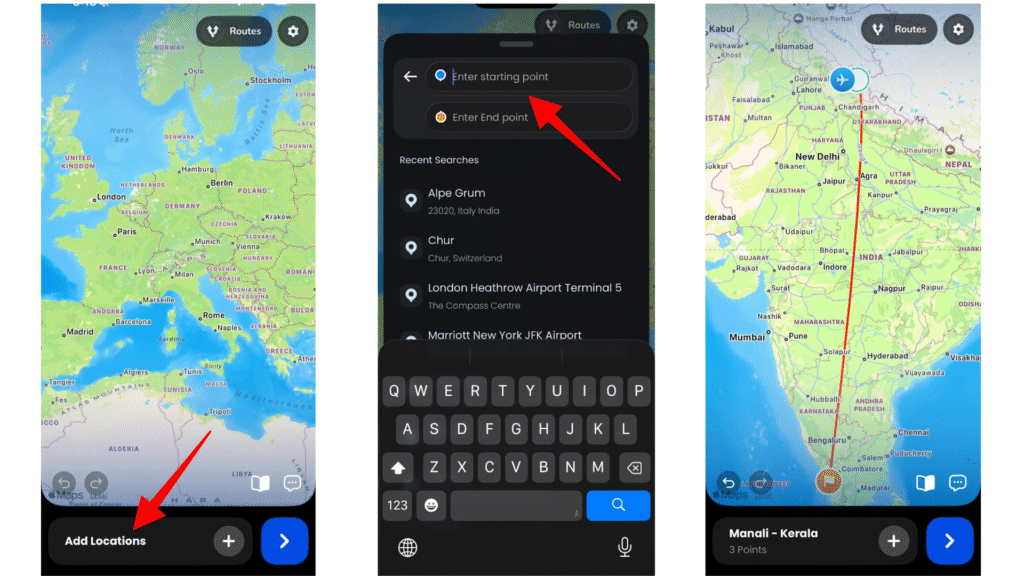
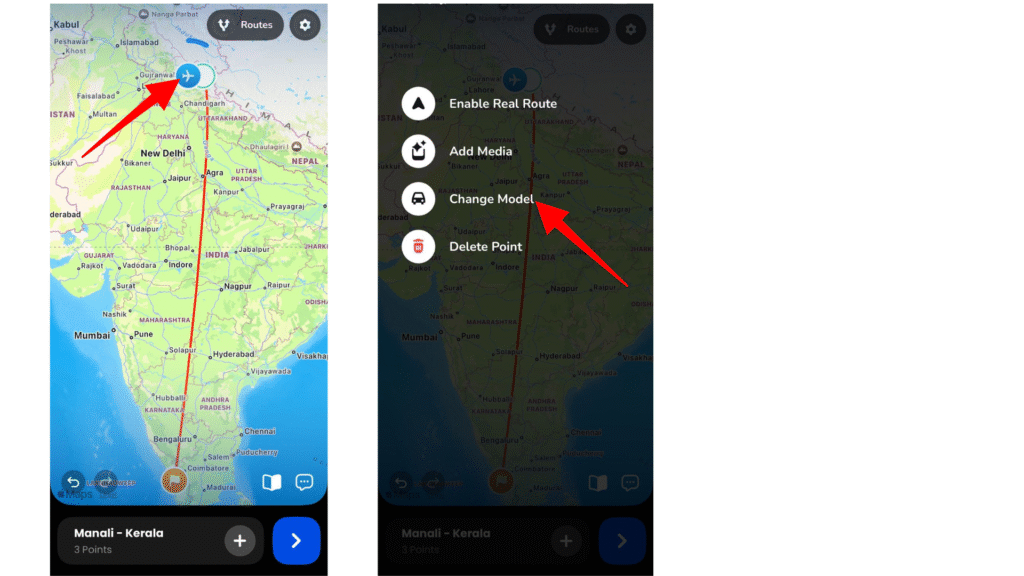
2. Locate the destination point where you want to change the model.
3. Long-press the point, then tap Change Model to open the model menu.
4. Browse available models and preview them.
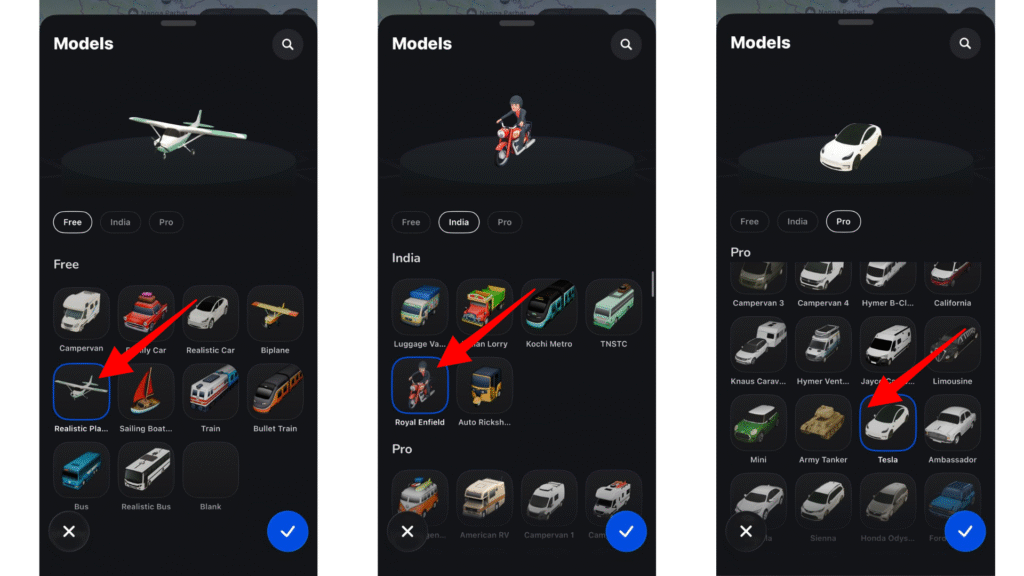
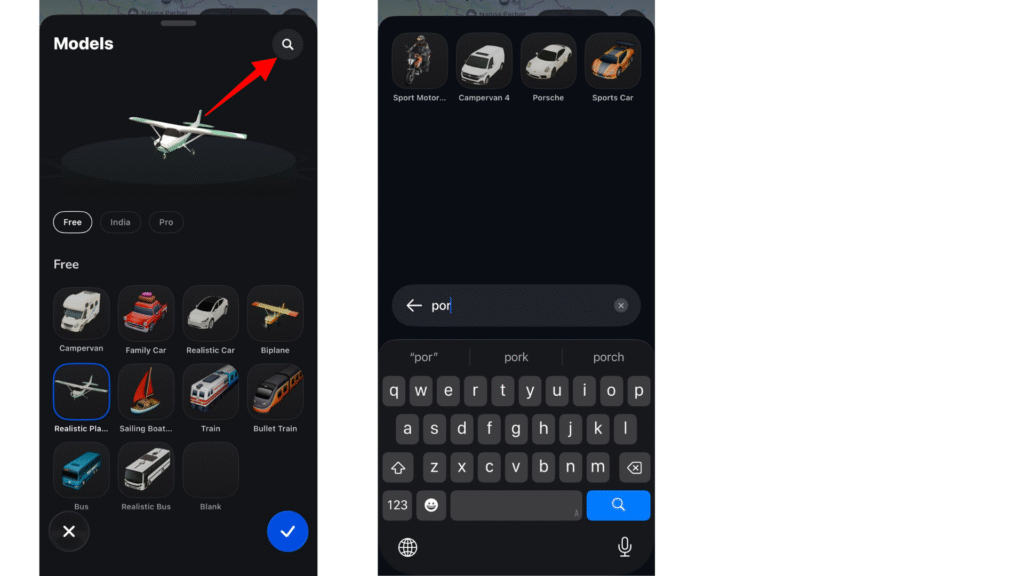
5. Select your desired model from 300+ various models. You can also search by model name.
6. After selecting the model, adjust the route path if needed.
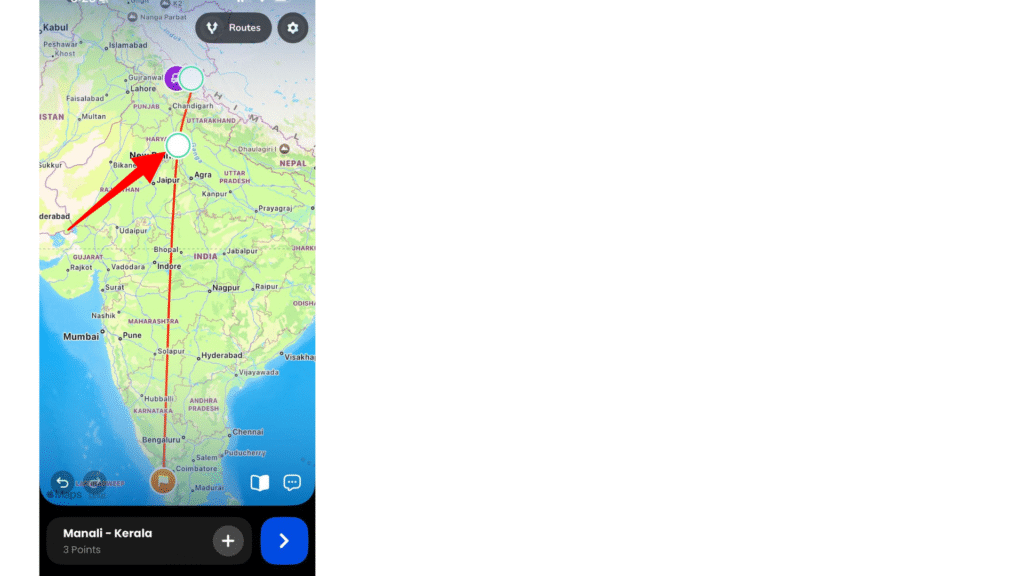
7. You can add another model or the same model in a other point. Repeat it for each destination point if needed.
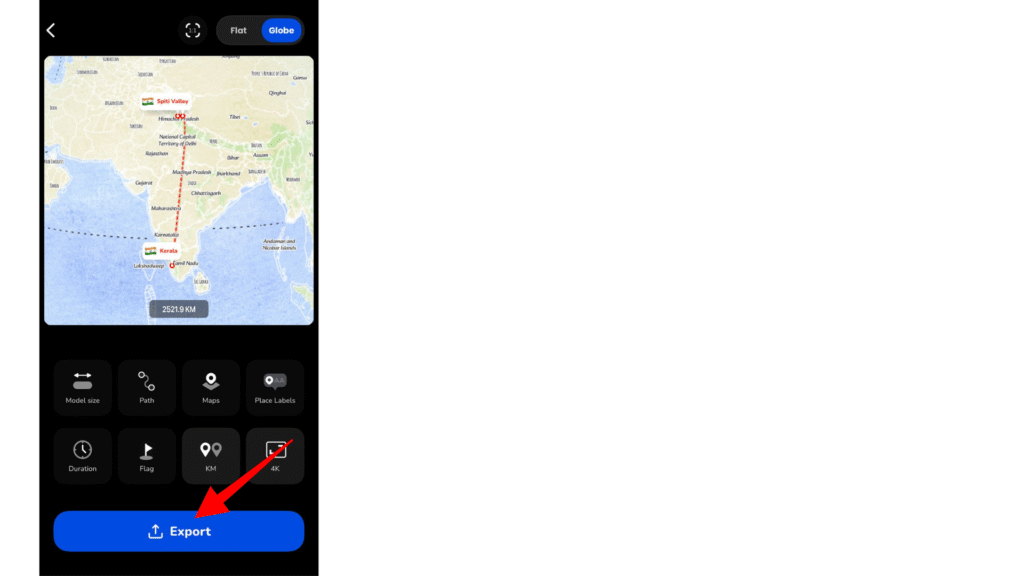
8. Preview your animation and adjust other features like ratio, model size, path, maps, place labels, duration, etc.
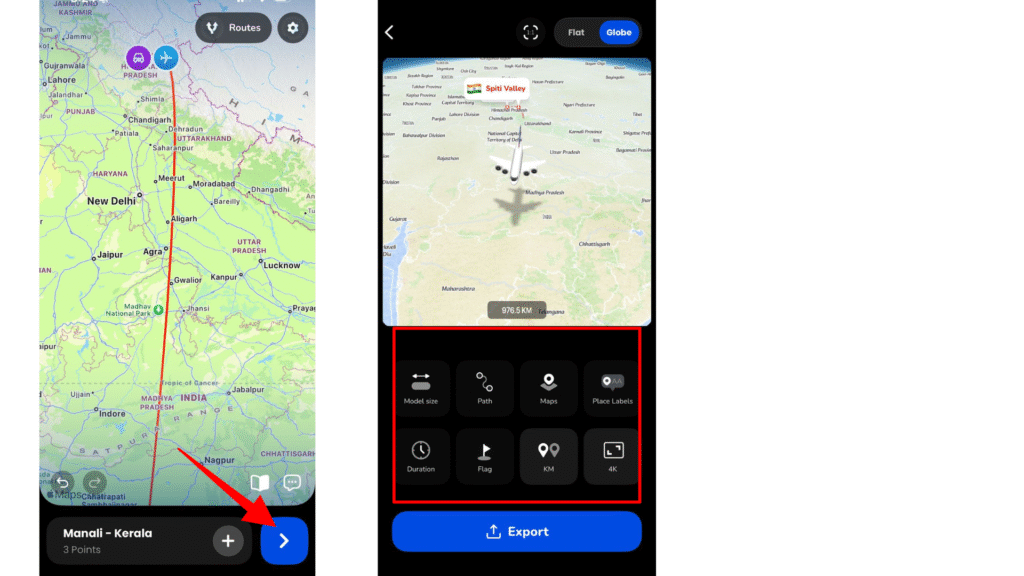
9. Export your video after confirming everything is perfect.
Video Tutorial of How to Change Models in TravelAnimator
How to Use Multiple Models in One Travel Animation
Using multiple models in a single travel animation allows you to turn a simple route into a complete travel story. Instead of using one mode of transport throughout, you can visually represent each stage of your journey as it happens in real life.
For example, imagine traveling from your home to Dubai. The first part of your journey might be a car ride to the airport, followed by a flight to your destination. By assigning different models to each segment, your animation becomes more dynamic and easier to understand.
The key is to think of your route as a sequence of experiences rather than a single path. Each destination point represents a transition, where you switch models to match the journey. When done right, these changes feel natural and create a smooth visual flow.
This approach not only improves storytelling clarity but also makes your videos more engaging for viewers. It works especially well for travel vlogs, Instagram reels, and YouTube intros where capturing attention quickly is essential.
Choosing the Right Model for Your Journey
Selecting the correct model is key to making your animation believable and visually engaging. Here’s how you can choose the right one based on different factors.
1. Distance
- For short trips within your city, state, or nearby destinations, it is better to use models like cars or bikes to reflect realistic travel.
- For long-distance or cross-country journeys, using planes or trains makes the animation more accurate and relatable.
2. Geography
- When your route follows land-based paths such as roads or railways, cars and trains are the most suitable models.
- If your journey includes rivers, seas, or coastal travel, choosing a boat helps match the environment.
- For international routes that cross countries or continents, planes are the most appropriate choice.
3. Location Context
- To make your animation feel authentic, it’s important to use models that match the region or culture of your destination whenever possible.
- You should also choose models that visually align with the overall style and experience of your journey, ensuring consistency throughout the animation.
Pro vs Free Models: What’s Available?
The Travel Animator app offers both free and premium models.
| Feature / Aspect | Free Plan | Pro Version |
|---|---|---|
|
Model Availability
|
Limited selection (e.g., basic biplane)
|
Access to 300+ models including premium options
|
|
Transport Types
|
Basic options only
|
Commercial aircraft, high-speed trains, luxury vehicles
|
|
Customization Options
|
Limited
|
Advanced customization and flexibility
|
|
Export Quality
|
HD export
|
4K export support
|
|
Use Case
|
Simple travel animations
|
Professional content, reels, and client work
|
If you’re creating content professionally or for social media growth, upgrading unlocks significantly better visuals and flexibility.
Tips for Creating Realistic Travel Animations
- Match model to route type. Don’t use planes for short city trips.
- Avoid over-switching models to keep it natural
- Use smooth transitions between destinations using images and texts
- Preview frequently to catch inconsistencies
- Align models with storytelling flow
FAQs
How can I change the model from car to plane?
Long-press the destination point where the journey changes, open the model menu, and select the plane model. Preview to confirm the transition.
Why are some models locked in TravelAnimator?
Certain models are part of the Pro version. Upgrade to unlock all available options.
What is the best model for international travel?
Planes are ideal for long-distance or international routes, as they match real-world travel behavior.
Tell Better Travel Stories with the Right Models
By aligning your transport modes with your actual journey, you create animations that feel authentic, engaging, and professional.
The Travel Animator app makes this process incredibly simple with its updated UI and smart features. Whether you’re a beginner or a content creator, mastering model switching can take your travel videos to the next level.
Unlock premium models, smoother transitions, and 4K exports by upgrading to Pro and start creating travel stories that truly stand out.

Jaseel S is the CEO and founder of Lascade, the app studio behind Travel Animator. He leads a team of 40+ engineers and designers building consumer mobile apps.
Related Articles
How Can I Access Routes Saved on One Device from Another Device in Travel Animator?
How to Add 3D Elements to Your TravelAnimator Videos
How to Highlight Specific Areas in TravelAnimator Maps
How to Add a Cover Image to Your TravelAnimator Video